How To Use Sandbags For Flooding (Where & How to Stack Sandbags)
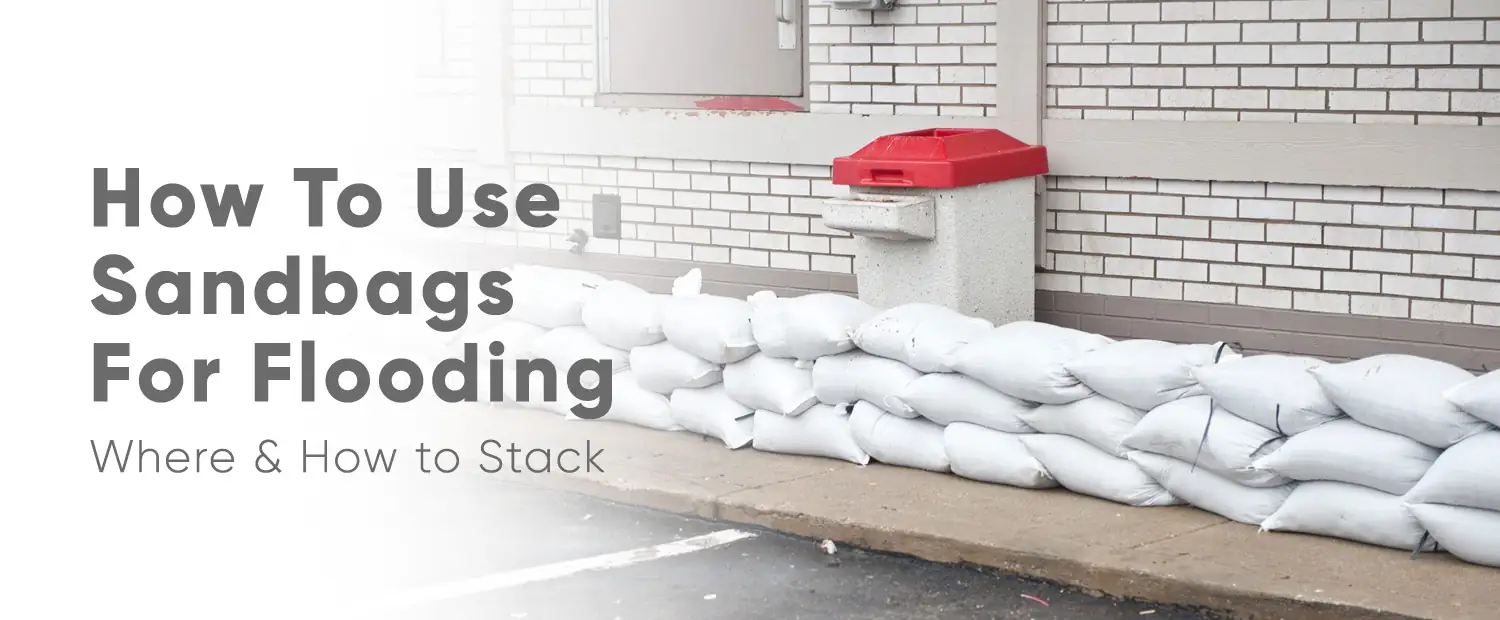
Knowing how to use sandbags for flooding is essential for protecting your property during heavy rainfall or potential flood events. Sandbags are a reliable and affordable solution to create barriers against rising water. Properly stacking sandbags is key to forming a sturdy barrier that can withstand the flow of water.
How do sandbags help with flooding?
Sandbags help with flooding by creating physical barriers that block or redirect the flow of water, preventing it from entering vulnerable areas like homes, roads, or businesses. When stacked correctly, they form a wall that absorbs water and withstands the pressure of rising floodwaters, offering essential flood protection.
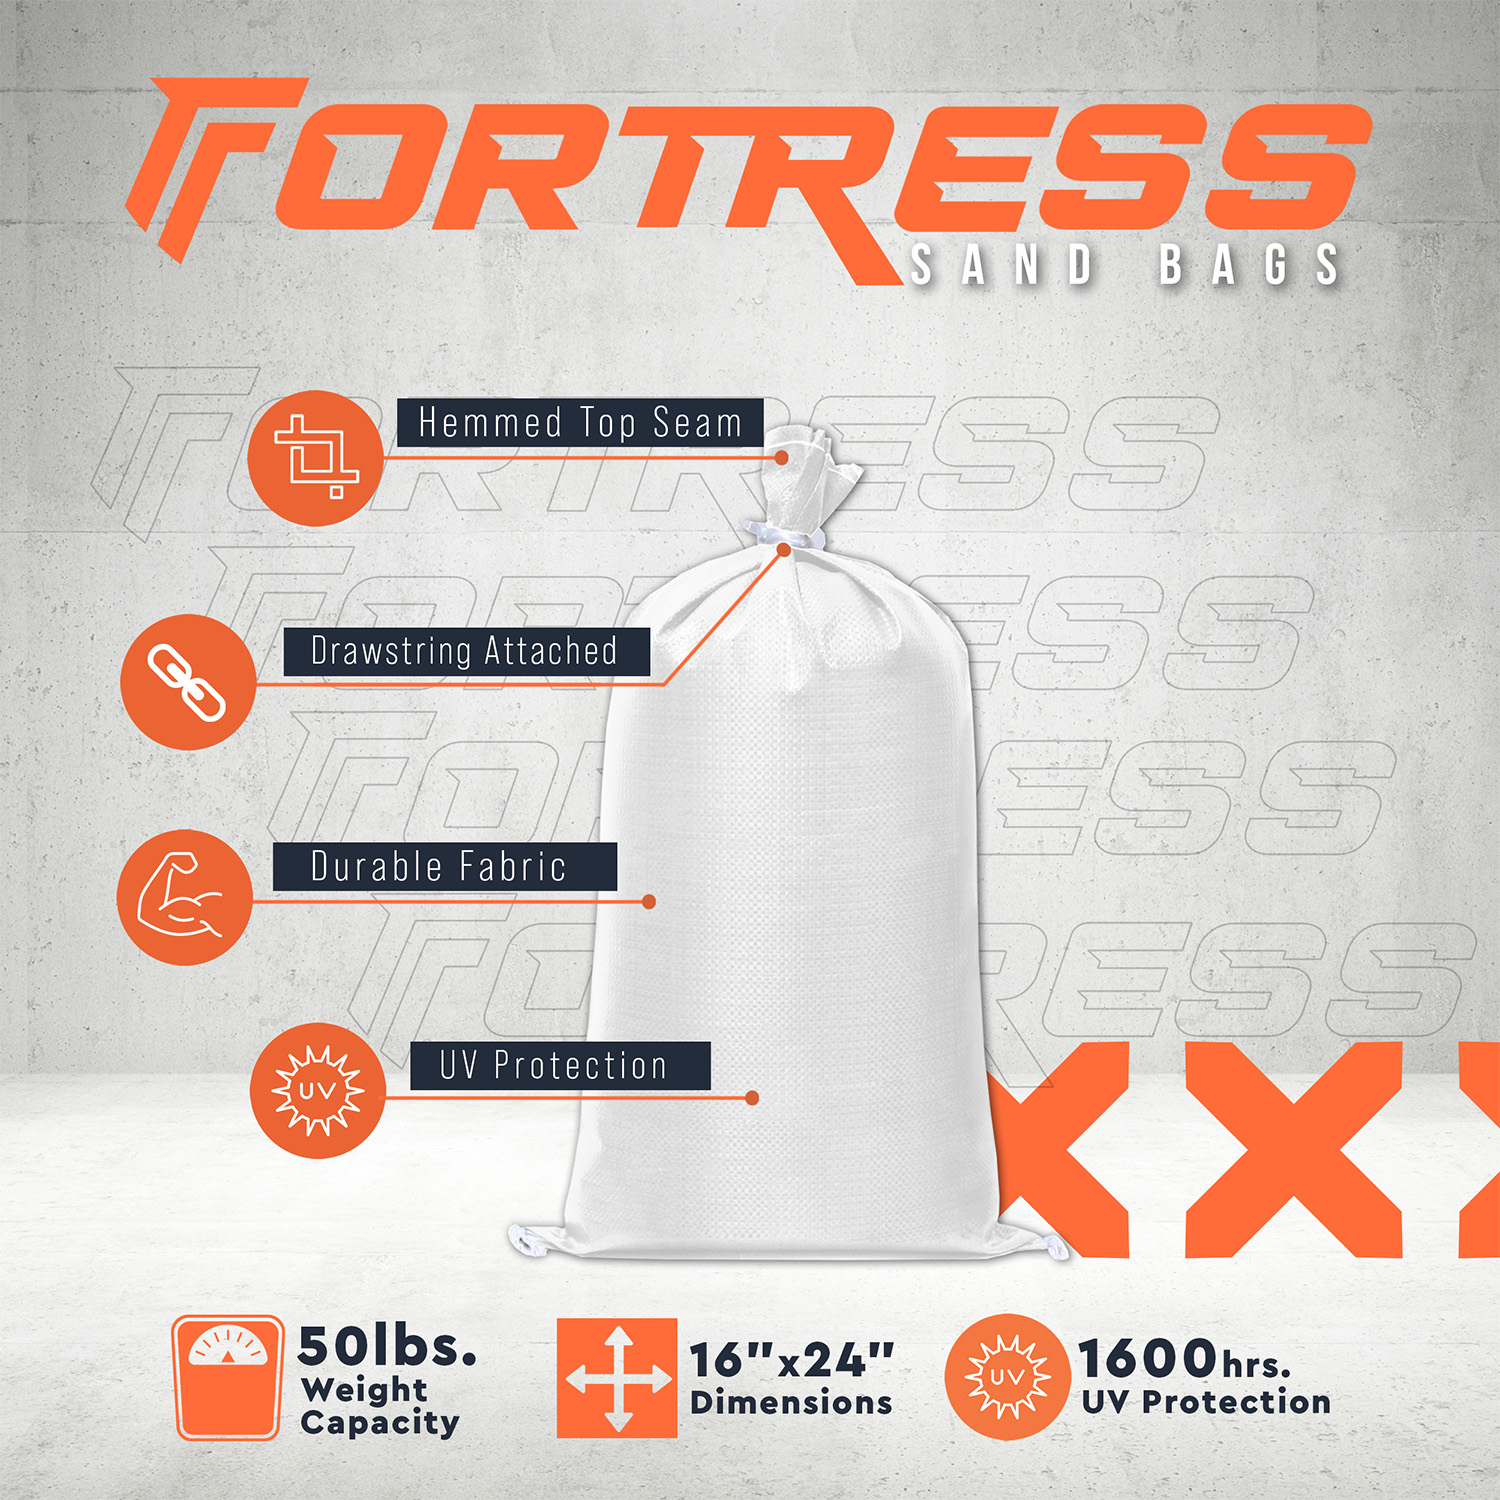
At Palmetto Industries, we are a trusted sandbag manufacturer, providing high-quality sand bags for sale that are designed to effectively combat floodwaters. Our sandbags are made for durability, ensuring they hold up under pressure and help you protect your property from water damage.
How to use sandbags for flooding
When preparing for a flood, it’s important to know where and how to lay sandbags for flooding effectively. Following the right steps ensures your flood barriers will hold up against rising water.
Below are the essential steps to take to use sandbags efficiently in flood defense.
1. Choose the Right Location
Start by identifying the most vulnerable areas of your property, such as doorways, windows, or low-lying ground near your foundation. These are the areas that will need the most protection. Ensure the ground is clear of debris and level for optimal placement of the sandbags.
2. Lay the Sandbags Flat
Place the first row of sandbags tightly together along the vulnerable areas. Make sure each bag is lying flat, with no gaps between them. This first layer is fundamental to provide a sturdy foundation for the rest of the sandbag wall. If necessary, consider using a tarp or plastic sheet underneath to prevent water seepage from below.
3. Stagger the Next Rows
Stack each subsequent row of sandbags in a staggered pattern to create a more stable wall. This brick-like pattern will prevent the sandbags from slipping and ensure that the wall can withstand the force of rising floodwaters. Each new layer should overlap the one below it, ensuring no direct alignment.
During your preparation, you might also wonder, how many sandbags do I need for flooding? The number of sandbags required will depend on the size of the area you’re protecting, the expected water level, and the height of the barrier you want to create. Be sure to calculate accordingly to ensure sufficient coverage.
4. Reinforce the Barrier
Once the wall reaches the desired height, check for weak spots or gaps between the bags. Fill any gaps with extra sandbags or filler material. If the flood is expected to be particularly severe, consider adding more layers or reinforcing the barrier with stakes to prevent collapse.
5. Maintain the Barrier Throughout the Flood
Once the sandbags are in place, monitor the situation. If necessary, reinforce the sandbag wall as the water level rises. Ensure that the sandbags remain tightly packed and reposition any bags that may have been dislodged.
6. Pump Out Excess Water If the Barrier Leaks
If sandbags start leaking, you can reinforce them with plastic sheeting or consider other alternatives to sandbags for flooding, such as water-filled barriers or flood diversion tubes. Additionally, you can use a water pump to remove excess water from the protected area.
Be Flood-Ready with Durable Sandbags – Keep water out and protect your home with our reliable, heavy-duty sand bags for sale.
How to fill sandbags for flooding
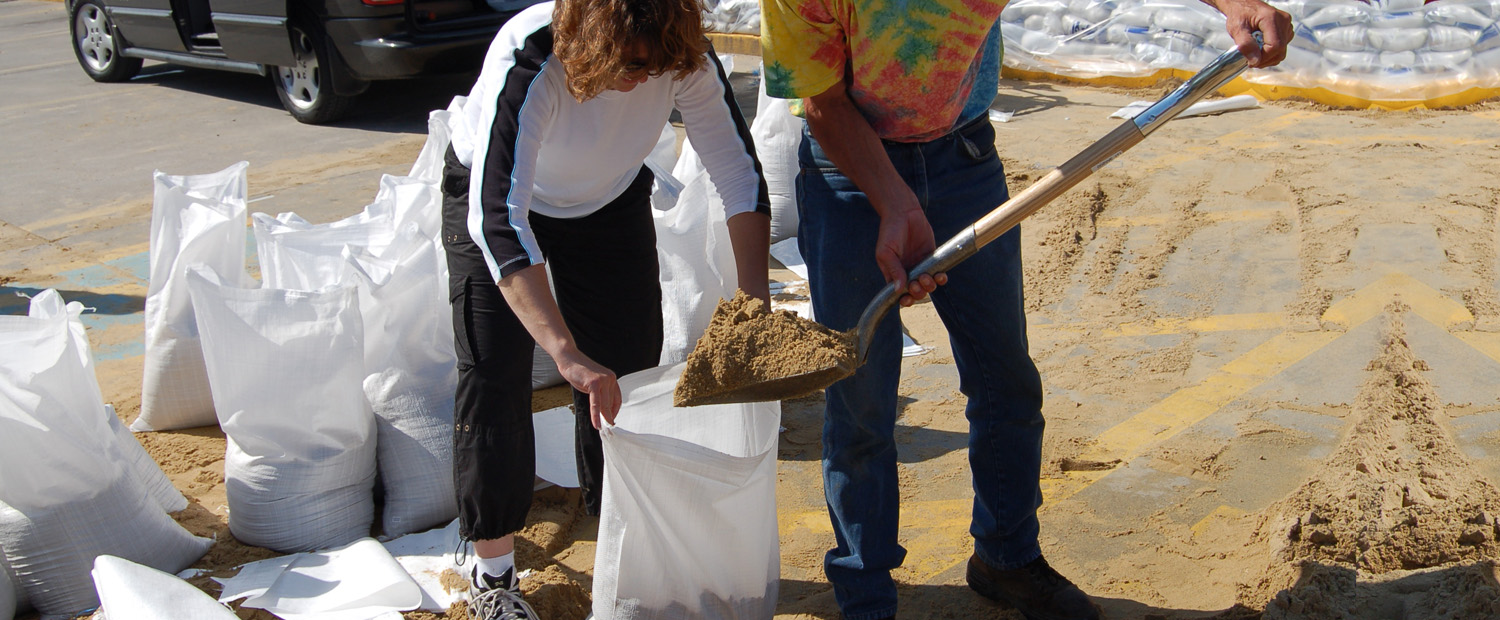
Properly filling sandbags is essential for their effectiveness in flood protection. Follow these steps to ensure you’re filling them correctly for maximum efficiency.
- Step 1: Prepare the Sandbags: Lay the empty sandbags flat on the ground and open the top wide enough to fill them with sand. Make sure the bags are positioned where you will be filling them, as moving them once filled can be challenging.
- Step 2: Fill the Sandbag: Fill each sandbag with sand, making sure it’s not overfilled. The bag should be about 2/3 full, allowing it to be sturdy but not too heavy to handle. Overfilling can make the sandbag difficult to stack and reduce its effectiveness.
- Step 3: Close the Sandbag: Once the sandbag is filled, fold the open end over to seal it. Tie the top securely with a rope or strong tie to prevent the sand from spilling out. Ensure there are no gaps in the closure, as any opening can allow water to seep through and weaken the barrier.
Where to put sandbags for flooding
Here’s where to place sandbags for flooding.
Outside
- Doorways: Placing sandbags around exterior doorways creates a strong barrier to keep water out.
- Windows: Sandbags around windows help protect the foundation from water infiltration.
- Low-Lying Areas: These areas are more prone to flooding, so placing sandbags in these spots redirects water and prevents it from pooling near your home.
Inside
- Basements: Place sandbags at the bottom of basement stairs to prevent floodwater from seeping in.
- Garage Doors: Sandbags at garage doors help prevent water from entering and damaging your belongings.
- Other Vulnerable Entry Points: Any other places where water can easily get in should be protected with sandbags.

How to stack sandbags for flooding
Stacking sandbags properly is essential for creating a strong, stable barrier to protect your property from flooding. Here’s a detailed guide on how to place sandbags for flooding to ensure they effectively block water flow.
1. Lay the first row flat and securely
Start by placing the first row of sandbags directly on the ground, positioning them tightly together with no gaps between them. Make sure the sandbags are evenly placed and lying flat.
The first layer is important, as it forms the foundation for the entire structure, so ensure it’s level and well-positioned. Use a tarp or plastic sheet underneath to help contain water and prevent seepage if the ground is uneven.
2. Stagger the next layer in a brickwork pattern
Sandbags should be stacked in a brick-like pattern for each new layer. This interlocking method mimics how bricks are stacked in construction, creating more structural integrity. Staggering the bags prevents them from slipping and ensures that each layer is securely anchored.
Each sandbag should overlap with the one below it, adding strength to the overall wall. Avoid placing sandbags directly on each other in a straight line, as this can create weak spots.
3. Build the wall to the desired height
Continue stacking the sandbags until the wall reaches the necessary height. Typically, the stack should be about two feet high or higher, depending on the expected water level. After several layers, check the wall for any loose spots and adjust as needed.
To reinforce the wall further, use additional sandbags on weak spots or along the edges to ensure they remain stable.
If the floodwaters are expected to rise significantly, consider stacking sandbags to a height that can handle additional pressure from water pushing against the wall.
4. Seal gaps and anchor the wall
Once your sandbags are stacked, walk around the wall to check for gaps between the bags. Even small gaps can allow water to seep through, so filling any openings with additional sandbags or filler material is important.
If necessary, anchor the wall using stakes or other stabilizing methods, especially in areas where the floodwater is likely to be more forceful.
Reach out to Palmetto Industries today for sandbags to prevent flooding
When it comes to protecting your property from flooding, having the right materials is essential. Palmetto Industries offers high-quality sandbags designed for flood defense. Our sandbags are durable, reliable, and designed to withstand the elements, ensuring you can effectively prevent water damage and keep your property safe.
Don’t wait until the floodwaters rise—prepare today with our sand bags for sale.
Final points on how to set up sandbags for flooding
When setting up sandbags for flood protection, it’s fundamental to follow the proper steps to ensure a sturdy and effective barrier. Key takeaways include:
- Strategic Placement: Start by identifying the most vulnerable areas, such as doorways and windows, to protect with sandbags. Knowing how to sandbag a doorway properly can make a significant difference in preventing water from entering your home.
- Proper Filling: Fill the sandbags to about two-thirds capacity, ensuring they are heavy enough to stay in place but not overfilled, which makes them difficult to handle and stack.
- Staggering for Stability: Stack sandbags in a brick-like pattern to reinforce the structure and prevent water from seeping through.
- Regular Monitoring: Once the sandbags are in place, continue monitoring the water level and reinforcing the barrier if necessary. Look for weak spots and be ready to add additional sandbags as the floodwaters rise.
In summary, what are sandbags used for in flood situations? They are a reliable and cost-effective flood protection tool, helping divert water and prevent damage to your property. Following these key points will give you a stronger and more resilient barrier to withstand the flood.
Sandbags For Flooding FAQ

By Purvis King
Bringing over 35 years of textile and flexible packaging experience to Palmetto, Mr. King earned his Bachelor’s Degree in Mathematics and Physics from Augusta College in 1985. He is skilled in all aspects of manufacturing and engineering of flexible, woven polypropylene plastics. In his free time Mr. King enjoys playing disc golf with his two sons and enjoying the outdoors.